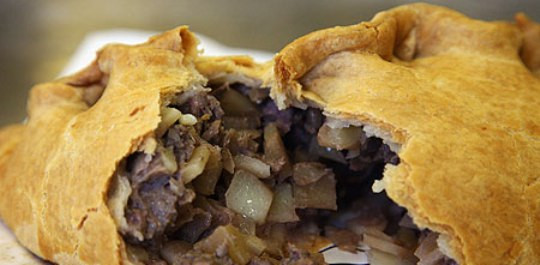
Late Grandma Pengelly, my former mother-in-law, took great pains to teach me how to make a proper Cornish pasty as enjoyed generations back. In fact it must have been the first and most important Cornish family tradition to pass on to the then new daughter-in-law.
It was almost a family rite of passage when the youngest in the family eat their first pasty, and well, that was celebrated! The idea was that the youngster would not get a piece of pasty cut off to try. Oh, no! they had their very own mini pasty!
Here’s an old one of my son, Titus with his first pasty.
Many, many years of happy pasty making followed, or should I say, ‘happy-pasty-eating’ as to make them really takes time, so they become special times food.
Well, after more than 10 years, I finally made another Cornish Pasty.
Now, I have to give a warning straight away: to make pasties is a work of love …. it’s really laborious, and you’d be tempted to make short cuts. I was lazy yesterday and did not follow the instructions as I was taught (as I will explain later on), and the result was really disappointing.
I took the pictures below showing my mistakes …. well, next time, I’ll add the photos of the correct way. The reason why I actually include my mistakes here is to show you that with traditional recipes creative changes or lazy short cuts do not work!
Ingredients:
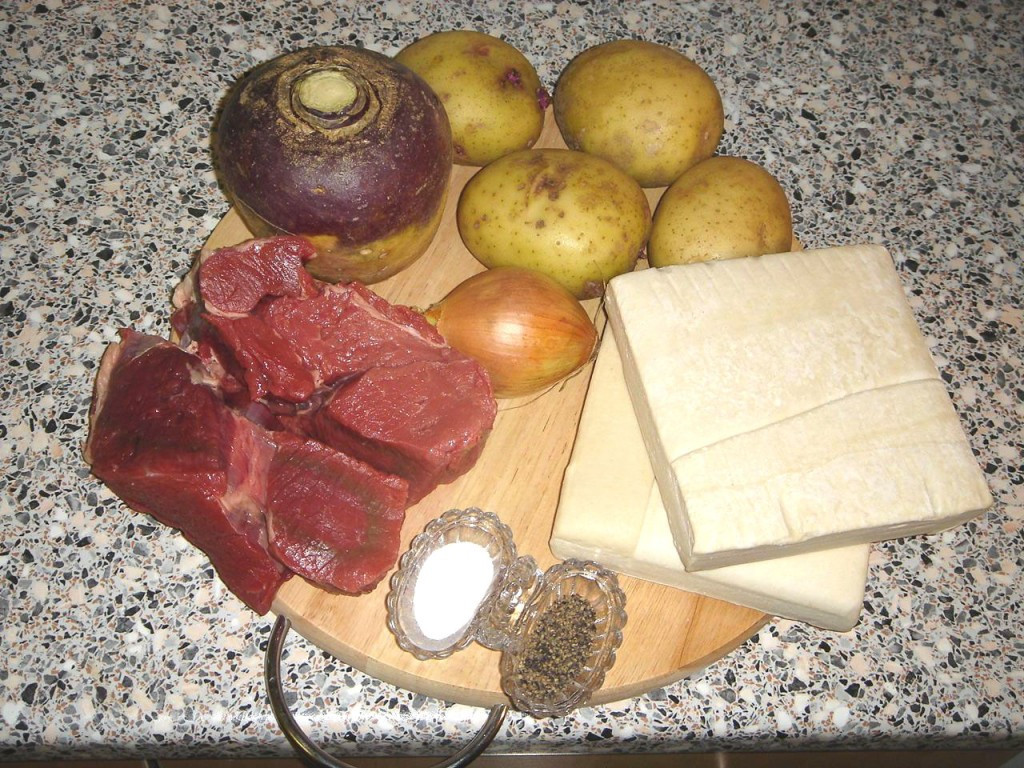
The ingredients are really simple: Beef, potatoes, swede, onions, salt & white pepper, and of course the pastry.
Anyone who knows me, has seen me experiment with recipes. Certainly I have done this with a Cornish Pasty in the past …. such as, I added garlic and herbs, etc. Trust me, it does not work!! You might wind up with a pleasant meat pie, but completely lose the original West Country / Cornish flavours that are so special with this particular traditional dish. So, just salt and pepper!!
OK, let’s start. Here are the ingredients:
Now straight away, I will have to point out the first mistake showing in the picture below: I did not use the right cut of beef. It should be Skirt Steak (if you absolutely cannot get skirt, then get shin). I did this mistake, simply because I was too lazy to go to a proper butcher, and the local supermarket just did not have skirt.
You see, skirt is rich in flavour and extremely juicy, the cut of beef (shown here),which I used yesterday was dry with hardly any flavour…. it really messed up the flavour of the entire pasty, very disappointing … plus the pasty was much dryer because of it.
Oh yes, and another thing, don’t ever, I mean it, don’t ever be tempted to use minced beef. I know it takes a while to cut the beef into these tiny bits, but again, trust me, it makes a big difference doing it properly!
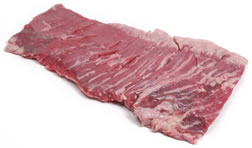
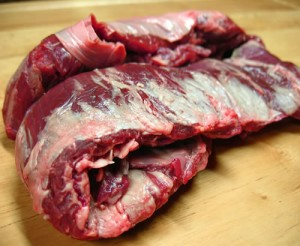
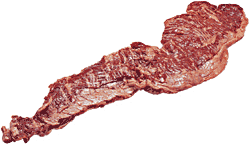
Towards the end, I’ll include a few pictures to help you identify skirt steak.
Oh yes, the pastry. The ideal pastry is ‘flaky pastry’.
It’s a type of pastry that’s rolled, folded and re-rolled several times to create layers of pastry which in the heat of the oven will rise into thin leaves. Heavier than puff pastry, but easier to make, it’s usually used for savoury pies and is often baked with a roasting pan full of water at the bottom of the oven because the steam helps the pastry rise evenly and develop a crisp crust…..
Well, if you are ambitious enough to make your own pastry, I’ll add an apparently quick and easy flaky pastry recipe by Delia Smith at the end. Meanwhile, I used frozen shop bought pastry ( frozen short crust pastry), which even Grandma Pengelly thought was permissible.
The next pic shows all the ingredients prepared:
Right, here you’ll see my next mistake: I was lazy and chopped the potatoes. Sigh! Again, it actually makes a huge difference in the texture and the way the flavours are absorbed.
Slice the potatoes into minute slivers, extremely finely. Keep the slices exceptionally small and thin. NEVER diced!
The swede, or swede turnip, should be thinly sliced like the potatoes. Whereas it’s ok to finely dice the onions.
By now you might be asking, hey, can’t you give us the specific amounts of the ingredients?
Well, Grandma Pengelly never weighed or measured out the pasty ingredients (except for the actual flaky pastry). She was always very generous, packing in loads of the filling, so that you almost have to stretch the pastry to close it (and sometimes use little pastry patches to bandaid over some tares … oh yes she really crammed the ingredients in!).
Just roughly, it was approximately half meat and half vegetables.
The potatoes and swede proportion, it was roughly 1/3 swede to 2/3 potatoes.
Next:
Dust the work surface with flour (again you see a mistake I have made. I did not have ordinary white flour in my cuboard, so I used wholemeal flour …. geez we wound up with speckled looking pastiies!). Roll out the pastry to about 1/4 inch thickness. (Use a plate cut out circle if you want to be precise). Then heap on the ingredients.
Place a layer of potato, a layer of swede, a layer of onion and then lastly the meat. Pepper and salt to taste – ensuring that there is sufficient pastry available to crimp and seal across the top. Dampen edges of pastry ring with milk to seal.
Close the pasty like this, pinch the edges together:
Then, fold over the edge for a better seal …
Grease a shallow large baking tray really well and then bake in a hot oven 220 degrees centigrade for about 20 minutes then reduce temperature to 160 degrees centigrade for a further 40 minutes. (you may need to reduce the temperature a bit if you use a fan assisted oven).
When done it should be golden brown …. the yummy pasty smells are by now wafting through your home. If you serve it straight away, be careful, these piping hot pasties can really burn your mouth.
Enjoy!!
Close the pasty like this, pinch the edges together:
Then, fold over the edge for a better seal …
Delia Smith’s Flaky Pastry:
“What should perfect flaky pastry be like? Answer: as light as possible, wafer-thin and so crisp it eats like a whisper so that you hardly know it’s there. Quick flaky pastry is really a cheat’s version – the secret is grating partly frozen butter, then mixing it with flour (so no boring rubbing in). It really does involve the minimum of skill but, at the same time, produces spectacular results. I promise you will be so pleased that you will probably make four more batches to put in the freezer for a rainy day.
First of all remove a pack of butter from the fridge, weigh out 4 oz (110 g), then wrap it in a piece of foil and return it to the freezer or freezing compartment of the fridge for 30-45 minutes.
Then, when you are ready to make the pastry, sift the flour and salt into a large, roomy bowl. Take the butter out of the freezer, fold back the foil and hold it in the foil, which will protect it from your warm hands. Then, using the coarse side of a grater placed in the bowl over the flour, grate the butter, dipping the edge of the butter on to the flour several times to make it easier to grate. What you will end up with is a large pile of grated butter sitting in the middle of the flour. Now take a palette knife and start to distribute the gratings into the flour – don’t use your hands yet, just keep trying to coat all the pieces of fat with flour. Now sprinkle 2 tablespoons of cold water all over, continue to use the palette knife to bring the whole thing together, and finish off using your hands. If you need a bit more moisture, that’s fine – just remember that the dough should come together in such a way that it leaves the bowl fairly clean, with no bits of loose butter or flour anywhere. Now pop it into a polythene bag and chill for 30 minutes before using. Remember, this, like other pastries, freezes extremely well, in which case you will need to defrost it thoroughly and let it come back to room temperature before rolling it out on a lightly floured surface.”
———————————————————-
Beef Skirt Steak:
Skirt Steak is a long, flat muscle cut from the beef flank and plate area.
In the United States, this cut of beef is a long, flat, boneless beefsteak taken from the plate primal of the beef carcass. Unlike the U.S., in Britain the Skirt Steak is typically cut from the flank primal. The Skirt Steak is a flavourful piece of meat but can be rather tough if it is not cooked or cut properly.
It might come with a slightly thick layer of fat and muscle membrane; so, you would need to trim the surrounding membrane if your butcher has not done it for you.
Apparently, skirt steak is also known as the “butcher steak” because it’s rarely found on meat counters—the butcher takes this one home.
Here are a few pics to help you identify this particular cut of beef:





0 Comments